With 3.5 million Android apps on Google Play and roughly 2.2 million available iOS apps on the Apple store, it’s no surprise that mobile apps dominate the business world.
Especially with the release of the newest iPhone update – iOS 16, there’s a constant buzz in the market to leverage the iOS 16 new features. Business leaders have begun actively investing in building robust cross-platform mobile apps that have an impact and target a more significant share of the market.
For those who have already built a mobile app, the next step is to understand the process of publishing an iOS to the Apple app store. We recently discussed the steps to publish an Android app on the Google Play store; moving forward in the series, in this blog today, we’ll have a detailed look at the process to publish an iOS app to the Apple Store.
Also, Read – How To Publish Your Android App On Play Store?
Let’s Begin!

A Guide to Publish iOS App to the Apple Store
Step 1 – Create Your Apple ID
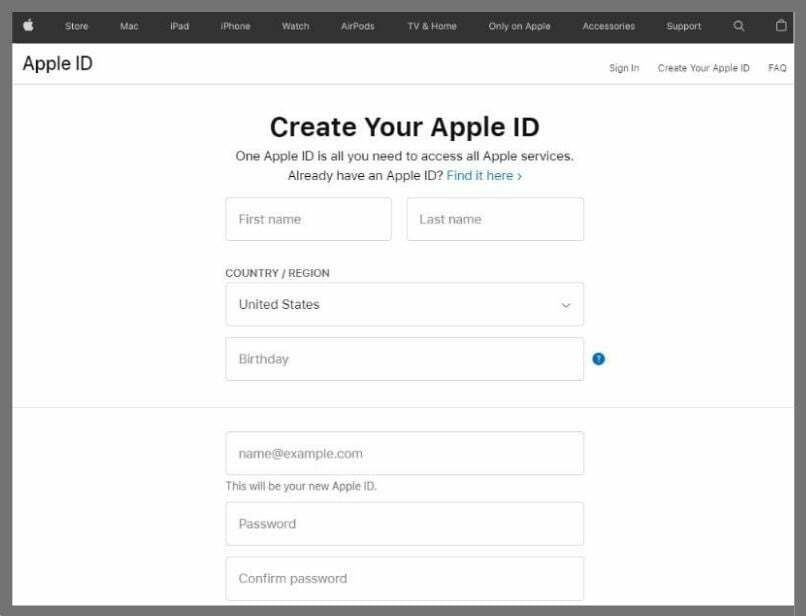
When a developer publishes an iOS app to the iPhone app store, the primary necessity is to create an Apple ID. Creating an Apple ID will proffer you access to all the services offered by Apple.
Step 2 – Apple Developer Program Enrollment
Once you create an Apple ID, the next step is enrolling as an Apple developer.
You can sign in to the Apple Developer Program using your Apple ID with two-factor authentication turned on. The two-factor authentication primarily ensures that you’re the only person with access to your Apple account, even if someone knows your password.

Associated Pricing:
- The Annual fee for the Apple Developer Program is 99 USD.
- The Annual fee for the Apple Developer Enterprise Program is 299 USD.
Further, enrolling in the App Developer Program will proffer multiple benefits like:
- iOS app development & distribution tools and resources
- Beta Software Access
- Guide to delivering advanced features in iOS apps
- Modern Testing tools for the iOS App
- Solid Technical support from experts
- Analytical tools & resources for advanced capabilities
Step 3 – Apple App Store Connect Sign in
The next step is signing into Apple App Store Connect. For Android apps, we have the Google Play Console; similarly, for iOS apps, we have App Store Connect.

Apple App Store Connect is primarily the backend operating all the apps published on the Apple Store. For example, one can create your own App Store Connect organization and become the team agent using their Apple ID to sign in and enroll in the Apple Developer Program.
App Store Connect lets the iOS app owners monitor their app’s sales and downloads, access app analytics, invite users to test their apps with TestFlight, enables them to respond to App Store Reviews, get notifications of new reviews, and more.
Also, Read – Mobile App Development Myths
Step 4 – Make Your App Ready for Submission
Once done with creating the Apple accounts and enrollments in the Storefront, the next step is to make the iOS app compatible with the norms of the Apple store and make the app ready for testing and submission.
The primary necessity is to create an iOS distribution provisioning profile and certificate to make the app compatible.
Before we understand further, it’s essential to know that the development provisioning profile and certificate a developer will use will only be for specific devices. However, you’ll need a separate distribution provisioning profile and certificate for distributing the iOS app to beta testers or users through the App Store.

For instance, the most convenient way of the provisioning & distribution process is by leveraging Xcode. As for any iOS expert, if the automatic signing is enabled, Xcode will automatically be able to create and manage certificates while signing in identities and handling device registrations.
Further, for those preferring manual sign-in, here’s the process:
- Add your Developer Program account to Xcode. Then navigate to the top menu, select Xcode, then choose Preferences.
- Click on Accounts. Go to the bottom left corner of the window, press the + sign, then Add your registered Apple ID.
- Leverage your Apple IS and the password you used for the Apple Developer Program to Sign in.
- Navigate to the Project Editor, choose a target, select General, and enable automatic signing.
- Navigate to the “Signing” section at the bottom & click on the triangle icon to expand the settings.
- Then, finally, click on the box to begin Automatic management of signing in. Select your team.
In this case, Xcode automatically detects and registers it to your team provisioning profile whenever you connect a new device to your Mac.
In addition, it’s imperative to know that the device must be registered on your team provisioning profile to launch your app on a device.
Step 5 – Create App Store Listing Using App Store Connect
The next step is to create an app store listing; how to do; here are the steps:
- The primary step is to Log in to App Store Connect.
- From the App Store Connect Dashboard, navigate & select My Apps.
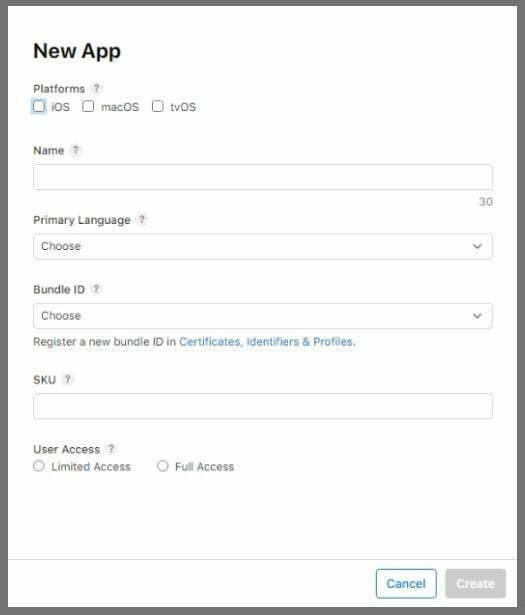
- Then, navigate to the upper left corner, click the “+” sign in and select New App.
- Next, you must select the platform for which you want your app to be available. Fill in the necessary information like name, language, bundle ID, SKU, and user access. After you are done, click on Create.
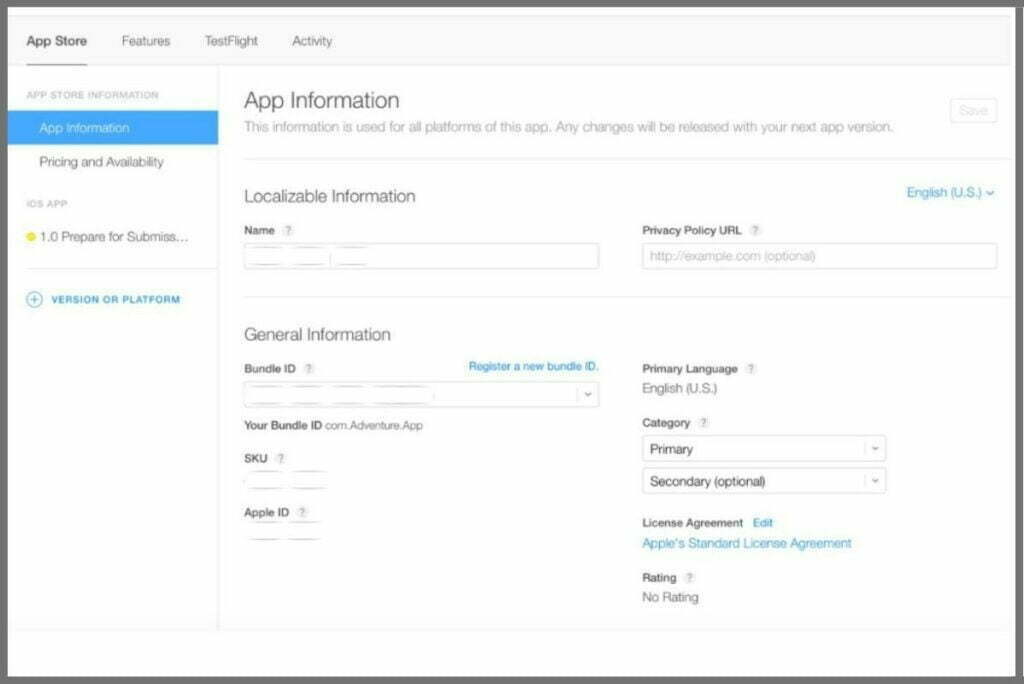
- From the left panel, you’ll be able to select App Information; once selected, add further information like your app’s general information, subtitles, categories, etc.
The following step is to define the pricing and availability of your iOS app. So, navigate to the left panel, and determine Pricing Availability and other required details.
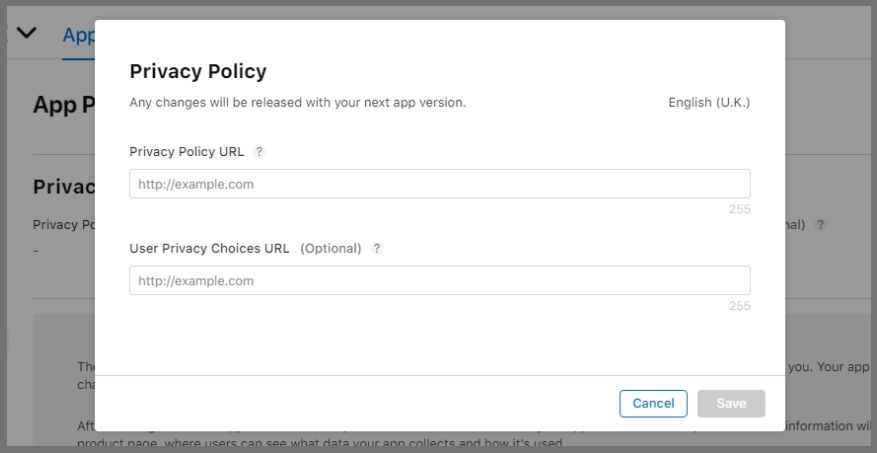
When publishing an iOS app, enter the privacy policy URL to define the App’s Privacy as the next step.
Now, select 1.0 Prepare for Submission from the left pane. Then, navigate the Version Release section and define how the app will be released once it passes the certification process.
- Manually – Go to App Store Connect to release the app.
- Automatically – Automatically release the app.
- Specific Date – Schedule the app release date.
FOR PAID APPS
In case of submitting a paid app, you’ll need to sign a contract that covers the payment terms.
- On the App Store Connect dashboard, Navigate and click Agreements, Tax, and Banking.
- Under “Request Contracts.” Choose request
- Go through the agreement that appears in front of you, check the box signifying your agreement to the terms, then click Submit.
- In the “Contracts In Process,” navigate and click on Set Up in the Contact Info column.
- Enter your information in the window by clicking on Add New Contact.
- Next, go the the “Contracts In Process” in the “Bank Info” column, choose Set Up, and fill in the necessary Bank Account information.
- Scroll to the “Tax Info” column, then click on Set Up. A U.S. Tax Form and fill out the asked information.
On completion of the above essentials, the contract’s status will turn to “Processing.” And Post verification by Apple, the status will further reflect under “Contracts In Effect.”
Once done, you can follow the above steps to create an app listing.
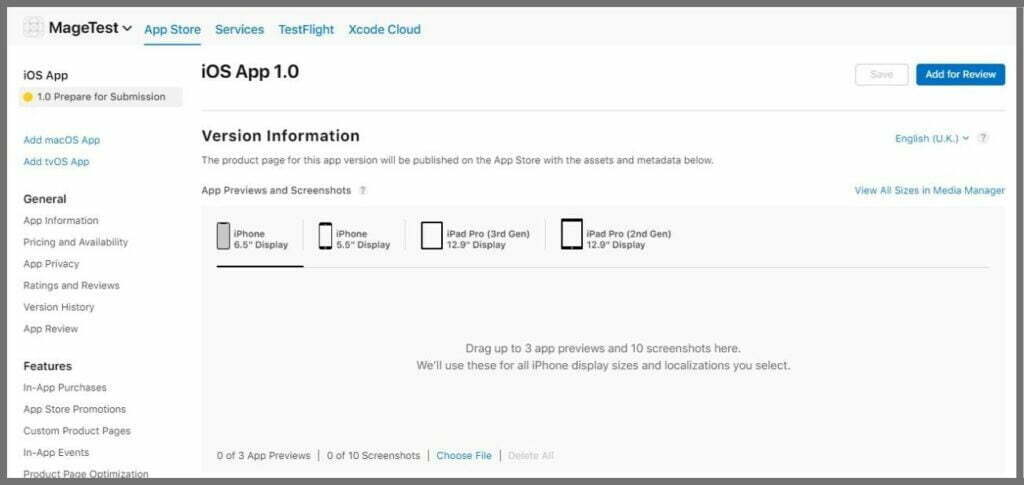
Step 6 – Upload App Store Screenshots and Previews
The next step to publishing your iOS app is to submit the app screen & previews for review. While submitting, ensure to follow the specifications defined by the Apple store to reduce the chances of your app’s rejection.
Video Specifications
| Video Specification | H.264 format | ProRes 422 (HQ only) format |
| Target bit rate | 10-12 Mbps | VBR ~220 Mbps |
| Video characteristics | Progressive, up to High Profile Level 4.0 | Progressive, no external references |
| Max frame rate | 30 frames per second | 30 frames per second |
| Audio | Stereo Codec: 256kbps AAC Sample Rate: 44.1kHz or 48kHz All tracks should be enabled Stereo configuration:1 track with 2-channel stereo (1st channel L and 2nd channel R) 2 tracks with 1-channel stereo (1st track L and 2nd track R) | Stereo Codec: PCM or 256kbps AAC Bit Depth (for PCM): 16-, 24-, or 32-bit Sample Rate: 44.1 or 48kHz All tracks should be enabled Stereo configuration:1 track with 2-channel stereo (1st channel L and 2nd channel R) 2 tracks with 1-channel stereo (1st track L and 2nd track R) |
| Supported extensions | .mov, .m4v, .mp4 | .mov |
App Preview Resolutions
You can deliver app previews with the following resolutions.
| Device size or platform | Native resolutions | Accepted resolutions | App Preview source |
| 6.5 inch (iPhone 14 Plus, iPhone 13 Pro Max, iPhone 12 Pro Max, iPhone 11 Pro Max, iPhone 11, iPhone XS Max, iPhone XR) | 2688 x 1242 pixels (19.5:9 aspect ratio) | 886 x 1920 pixels (portrait)1920 x 886 pixels (landscape) | Upload 6.5-inch previews |
| 6.7 inch (iPhone 14 Pro Max) | 2796 x 1290 pixels (19.5:9 aspect ratio) | 886 x 1920 pixels (portrait)1920 x 886 pixels (landscape) | Default: scaled 6.5-inch previewsAlternative: upload 6.7-inch previews |
| 6.1 inch (iPhone 14 Pro) | 2556 x 1179 pixels (19.5:9 aspect ratio) | 886 x 1920 pixels (portrait)1920 x 886 pixels (landscape) | Default: scaled 6.5-inch previewsAlternative: upload 6.1-inch previews |
| 5.8 inch Super Retina Display (iPhone 14, iPhone 13 Pro, iPhone 13, iPhone 13 mini, iPhone 12 Pro, iPhone 12, iPhone 12 mini, iPhone 11 Pro, iPhone XS, iPhone X) | 2436 x 1125 pixels (19.5:9 aspect ratio) | 886 x 1920 pixels (portrait)1920 x 886 pixels (landscape) | Default: scaled 6.5-inch previewsAlternative: upload 5.8-inch previews |
| 5.5 inch (iPhone 8 Plus, iPhone 7 Plus, iPhone 6s Plus) | 2208 x 1242 pixels (Rendered Pixels)1920 x 1080 pixels (Physical Pixels)(16:9 aspect ratio) | 1080 x 1920 pixels (portrait)1920 x 1080 pixels (landscape) | Upload 5.5-inch previews |
| 4.7 inch (iPhone SE (3rd generation, 2nd generation), iPhone 8, iPhone 7, iPhone 6s, iPhone 6) | 1334 x 750 pixels (16:9 aspect ratio) | 750 x 1334 pixels (portrait)1334 x 750 pixels (landscape) | Default: scaled 5.5-inch previewsAlternative: upload 4.7-inch previews |
| 4 inch (iPhone SE (1st generation)) | 1136 x 640 pixels (16:9 aspect ratio) | 1080 x 1920 pixels (portrait)1920 x 1080 pixels (landscape) | Default: scaled 5.5- or 4.7-inch previewsAlternative: upload 4-inch previews |
| 12.9 inch (iPad Pro (4th generation, 3rd generation)) | 2732 x 2048 pixels (4:3 aspect ratio) | 1200 x 1600 pixels (portrait)1600 x 1200 pixels (landscape) | Upload 12.9-inch iPad Pro (3rd generation) previews |
| 12.9 inch (iPad Pro (2nd generation)) | 2732 x 2048 pixels (4:3 aspect ratio) | 1200 x 1600 pixels (portrait)1600 x 1200 pixels (landscape)900 x 1200 pixels (portrait)1200 x 900 pixels (landscape) | Upload 12.9-inch iPad Pro (2nd generation) previews |
| 11 inch (iPad Pro, iPad Air (5th generation, 4th generation), iPad mini (6th generation)) | 2388 x 1668 pixels (4.3:3 aspect ratio) | 1200 x 1600 pixels (portrait)1600 x 1200 pixels (landscape) | Default: scaled 12.9-inch iPad Pro (3rd generation) previewAlternative: upload 11-inch previews |
| 10.5 inch (iPad (9th generation, 8th generation, 7th generation) iPad Pro, iPad Air) | 2224 x 1668 pixels (4:3 aspect ratio) | 1200 x 1600 pixels (portrait)1600 x 1200 pixels (landscape) | Default: scaled 12.9-inch iPad Pro (2nd generation) previewsAlternative: upload 10.5-inch previews |
| 9.7 inch (iPad, iPad mini) | 2048 x 1536 pixels (4:3 aspect ratio) | 900 x 1200 pixels (portrait)1200 x 900 pixels (landscape) | Default: scaled 12.9-inch iPad Pro (2nd generation) or 10.5-inch previewsAlternative: upload 9.7-inch previews |
| Apple TV | 1920 x 1080 pixels (16:9 aspect ratio) | 1920 x 1080 pixels | Upload Apple TV previews |
| Mac | 1920 x 1080 pixels (16:9 aspect ratio) | 1920 x 1080 pixels | Upload Mac previews |
App Preview Requirements
The following are required to create your app preview and upload it to App Store Connect.
| Context | Description |
| Maximum file size | 500MB |
| Minimum length | 15 Seconds |
| Maximum length | 30 Seconds |
| Default poster frame setting | 5 Seconds (See Set an app preview poster frame.) |
| Orientation | Portrait or Landscape (Note: macOS app previews accept landscape only.) |
| OS device capture and play | iOS 8 or later. |
| Upload and playback on App Store Connect | Safari 8 and macOS 10.10 or later. |
Step 7: Archive and upload your app using Xcode.
It’s imperative to upload the build through Xcode before submitting your app for review through App Store Connect; here are the steps for the same:
- Primarily, Choose a Generic iOS Device in Xcode as the deployment target.
- Navigate to the top menu, choose Product and click on Archive.
- Xcode organizer will display Archives and their details.
- As you publish, ensure that the current build is selected as you finally click Upload to App Store from the right-hand panel.
- Click Choose once you’ve added your credentials.
- Click upload from the next window at the bottom right-hand corner.
Once the above process is followed effectively, and the upload is completed, you’ll receive a success message; once you can see the message, Click Done.
Step 8: Configure your app’s metadata and further details.
Once you are done defining the privacy policies, app information, categories, languages, etc., Navigate to the “Features” tab, and add configurations to the appropriate App Store technologies, for instance, Game Center and in-app purchases.
Once done, you’ll see your app denoted with the status “Prepare for Submission” and a yellow dot in the left-hand panel under “App Store.” You must select the build you wish to configure and add the required information for your App Store’s product page.
Then, enter your app’s description, keywords, support, and marketing URL.
- A crucial determinant of your app’s ranking is your app’s description, so ensure that you put your best words forward within the 167-character limit.
- The supported URL is primarily where you want to take your end users, i.e., it can be a landing page or a contact us form.
- The third is the optional information which is your marketing URL; if you wish to add it, you can add your website or skip it.
Moving forward to the “General App Information,” you must upload your app’s icon along with copyright, contact information, and version number.
- The ideal size of the app icon will be 1024px x 1024px.
- The version number needs to be the same code you added to your Xcode.
- “Copyright (c) 2022, Coppermobile.com” is what your copyright info will look like.
- Lastly, the contact info can be your immediate number wherein users can connect with you.
Navigate to the EDIT tab next to “Rating” and choose the rating that you think is the most applicable option for your app. Keep one thing in mind, your app’s approval depends on what’s your take on your app, so ensure that you are honest while rating your app.
Now scroll to the top right corner, and click Save. This is when you’re almost ready to “Submit for iOS App for Review.”
Step 9: Submit your app for review.
This is the final step to publishing the iOS app on the Apple store.
So navigate to the “Build” section from your app’s App Store Connect record.
You need to click “Select a build before you submit your app.”
Then, select the drafted build from Xcode, navigate to the bottom right-hand corner, click DONE, and then click Save in the top-right-hand corner to Submit for Review.
However, before your iOS finally gets submitted for review, you might have had to answer a handful of questions regarding the Export Compliance, Content Rights, and Advertising Identifier questions; once answered, click Submit.
The App status “Waiting For Review” will be visible after the above process.
Also, Read – The Top 10 Hacks for your App Store Optimization Strategy.
What’s Next?
Once your iOS app is submitted for review, all you can do is wait until the check is done. Usually, for the Apple store to review the app, it takes about one to three days. However, you might also see your app appearing on the Apple store in just 24 hours.
To keep track, you have to ensure that you regularly check the status of your app from the Apple store connect, select Activity in the top horizontal menu, then check out the App Store Versions in the left-hand panel.
Once your app is approved, ensure that you have a marketing strategy aligned with your business goals. Building a mobile application and publishing it to the app store can be tedious for most businesses.
Those finding it overwhelming can always seek guidance from top mobile app development companies and pave the way for a successful release of a robust enterprise app that results in business impact and growth.


